Step 1: WIP and Debtors
1.1. Writing off unwanted WIP in Caseware Time
Before performing a year end close, you should assess your current client database for accuracy and validity. Marking clients as “inactive” will ensure that only valid clients are included in your new year file. But before you can make any client account inactive, you need to write off any unwanted WIP on these client accounts.
To confirm whether a client has any transactions that can be deemed as unwanted WIP, run the following report:
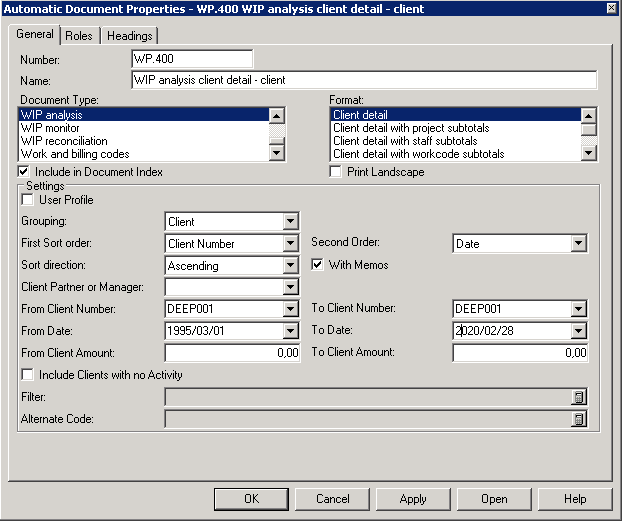
WIP Analysis Report with the following properties:
- Extend the date range as wide as possible e.g. 01/03/1995 to the 28/02/2020
- Document Type = WIP Analysis
- Format = Client Detail
- Filter on the specific client.
Once you have identified unwanted WIP balances to be written off on specific clients, you can do so by:
- Creating a zero final invoice and
- Marking off the WIP on the Billings from WIP screen.
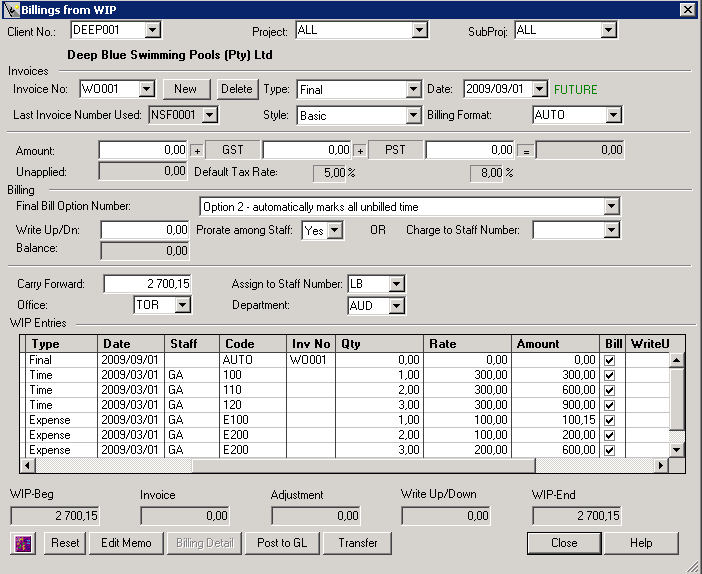
Option 1: How do I create a zero final invoice?
On the client that you want to write off final WIP. Click on Process | Billing/Invoices |Billings from WIP. Select the applicable client.
TIP:
Set the date of the write off invoice to the day before the date you want to make the client inactive. This will ensure that the system is not seeing the invoice an outstanding
transaction processed on the same date as the inactive date.
To make clients inactive, refer to step 2.
Option 2: How do I mark off the WIP on the Billings from WIP screen?
- In the Final bill option number box, select either Option 1 or 2 depending upon the nature of the
- write-off. The following explains the consequences of each option:
- Option 1 - to select individual WIP items that you want to write off. The amounts are calculated and assigned by percentage of the total.
- Option 2 - to write off all outstanding WIP for the client automatically.
- Option 3 - to automatically calculate the invoice amount (cannot use this when creating a zero final invoice).
- Option 4 - to select individual WIP items that you want to write off and set the amounts manually.
1.2 Reconciling WIP in Caseware Time
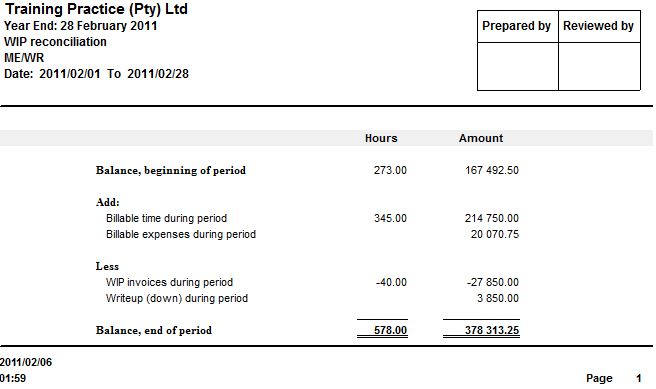
To reconcile the WIP in Caseware Time, print the WIP summary report and agree this to the WIP Reconciliation report.
WIP Summary report:

WIP Reconciliation report:
1.3. Items carried forward when performing a year end close
Only the following will be carried forward to the new year's file:
- Unbilled time, expense, carry forward entries and interim invoices
- Future-dated non-chargeable transactions
- Billed time, expenses or interim invoices when the "final" invoice on which they were billed is marked as still outstanding in Accounts Receivable.
The current year's non-chargeable time and expense entries will be purged during the year-end close procedure.
1.4. Accounts receivable in Caseware Time
Only outstanding invoices and unapplied payments on debtors will be carried forward to the new year’s file.
Please Note: If you are going to perform a Year End Close after the Year End Close date or on future periods they should not apply future cash receipts and credit notes to previous year invoices. If you have, you will need to unapply these cash receipts or credit notes before completing the Year End Close.
To avoid purging proposed invoices from the system during the year end close, perform one of the
following steps before proceeding with the year end close:
- Convert all proposed invoices to "interim" or "final".
- Carry forward all proposed invoices by changing the “date” to a date in the new year. Delete proposed invoices that are linked to clients you want mark as “inactive”.
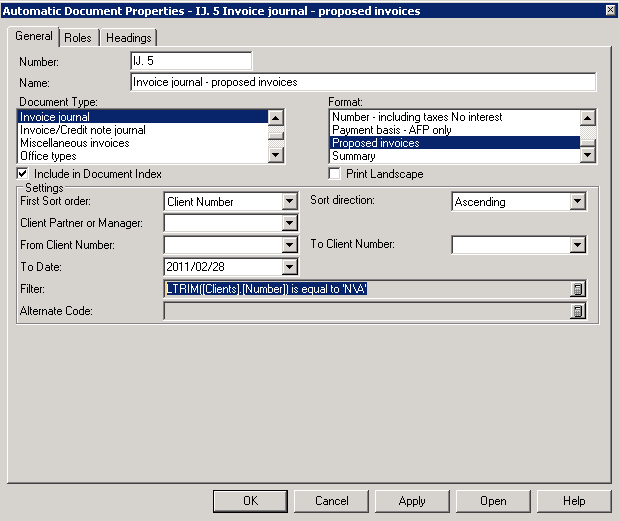
How do I check for Proposed invoices?
- Run an Invoice Journal report with the following properties:
- Extend the date range as far as possible e.g. from the beginning of your financial year to
- 01/01/2020.
- Document Type - Invoice Journal. Format - Proposed Invoices.
- If you want to check against a specific client (for a proposed invoice), the following dBase filter can be used:
- LTRIM([Clients].[Number]) is equal to 'N\A' (Replace the 'N\A' with your client code)
Once you have checked for proposed invoices, you should reconcile all other unapplied cash receipts or credit notes. This can be done on the Account Reconciliation dialogue window by clicking on
Process | Account Reconciliation.
How do I reconcile Accounts Receivable?
Print the Accounts Receivable Trial Balance total:
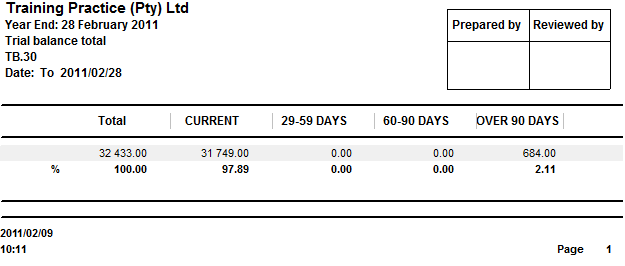
Agree this to the Accounts Receivable Reconciliation (RR.1) report:
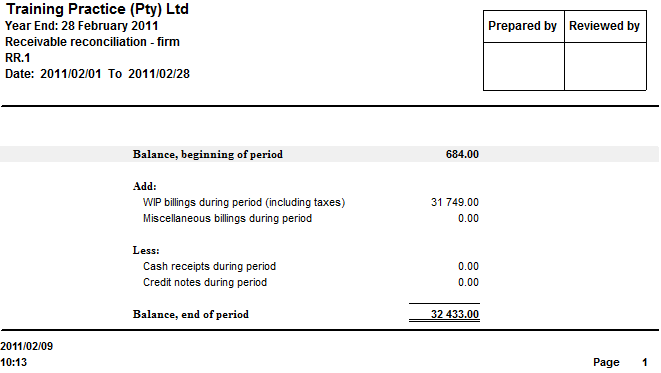
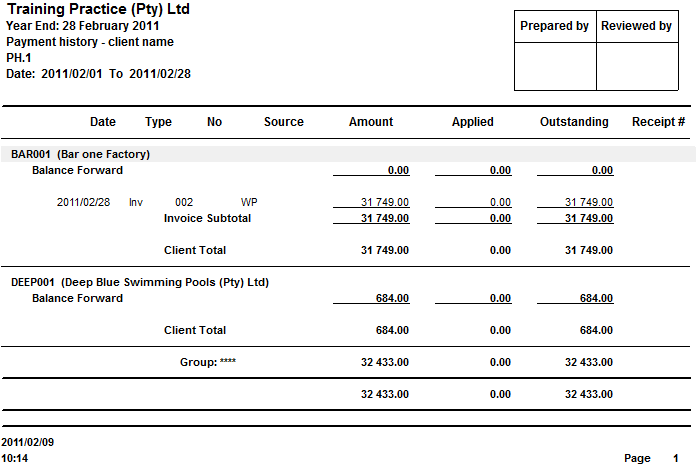
Also agree this with the Payment History (PH.1) report:
Should an inactive client have an outstanding debtor balance at year end, a credit note or a cash receipt will need to be created and applied to the client’s outstanding balance, to make the account zero.
TIP:
Date the credit note and/or cash receipt day before the date you want to make the client inactive, this will ensure that the system is not seeing the credit note and cash receipts as outstanding transactions processed on the same date as the inactive date.
How do I know if a client has a receivable balance?
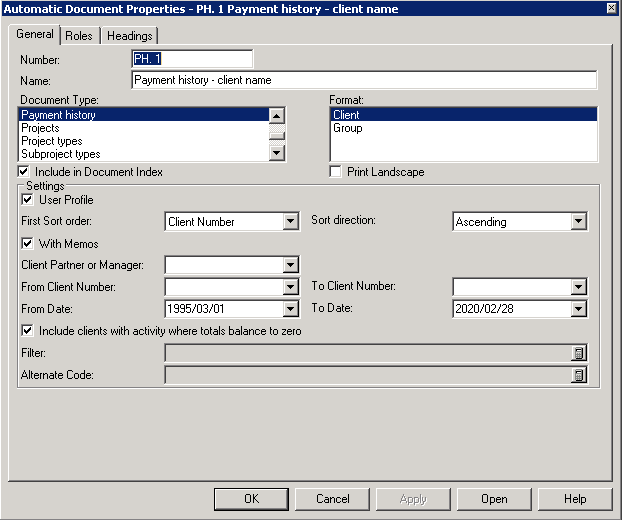
To confirm if client you want to mark as inactive has a receivable balance, run the Payment History report with the following properties:
- Extend the date range as wide as possible e.g. 01/03/1995 to 28/02/2020.
- Document Type - Payment History.
- Format - Client or Group if you are using Groups in Caseware Time.
- Filter on the specific client.
- Select the "Include clients with activity where totals balance to zero" box.
Step 2 Client Maintenance
2.1. Marking clients as “inactive” in Caseware Time
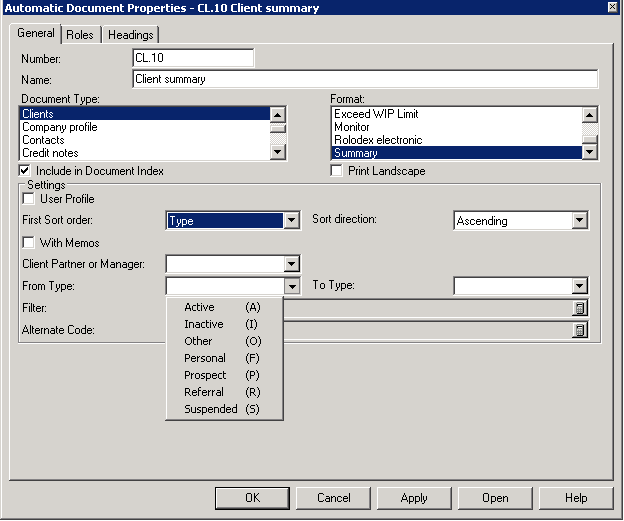
To obtain a list of your active/inactive Caseware Time clients print the Client Summary by Type report.
Right click on this report, select properties and set the document properties to:
- Document Type – Clients
- Format - Summary
- Order - Type (filter by type to get active, inactive lists)
To mark clients as inactive in Caseware Time, select Setup | Clients from the XXX menu, select the relevant client from the drop down arrow and select type as "Inactive".
On an integrated practice the clients need to be marked as inactive in Caseware Time, as well as TaxWare and/or SecWare.
How do I make clients inactive in TaxWare?
To make a client inactive in TaxWare, all tax information related to the client needs to be deleted.
In order to do this:
- Open the taxpayer on the Tax Payer window.
- Click on the Delete button on the shortcut menu bar.
- The Delete Taxpayer window will appear, select “Delete Taxpayer information only?”

- Click on OK, the tax information of the “inactive” client will be removed.
How do I make clients inactive in SecWare?
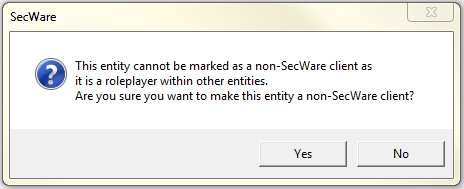
To mark a client as “inactive” in SecWare, you must mark the client as a non-SecWare client, by performing the following steps:
- Select the entity you want to mark as a non-SecWare client.
- On the entity’s information page go to the “Option” tab. Deselect the “SecWare Client” box.

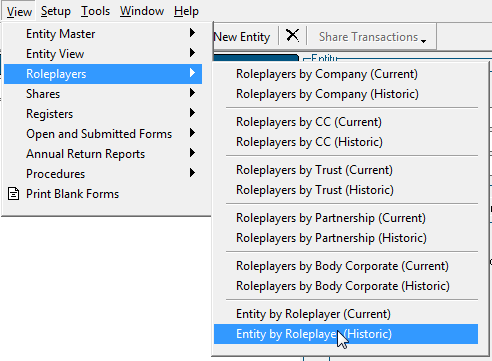
TIP: Before a client can be purged it cannot be a role-player on any other entity.
You can use the Entity by Role Player (Historic) report, to see if your client is a role-player in any other entity. Click on View | Role-players | Entity by Role-players (Historic)
If the client is a role-player on an active SecWare entity, the client needs to be marked as “Other” in Caseware Time and cannot be purged. For example if the client is a Director in a current SecWare client it cannot be purged and will have to be marked as “Other” in Caseware Time.
If the entity is a role-player on a SecWare client that’s also inactive at the time, mark both entities as non-SecWare clients. This will ensure that only active clients are retained after the year end close.
If the entity is still a role-player in another active entity, it will prompt you with the following message.
2.2. Revising client groupings in Caseware Time
Before doing a year end, you may wish to revise or update client groups to ensure data quality. This is an optional data maintenance option and will not affect your actual year end close to be performed.
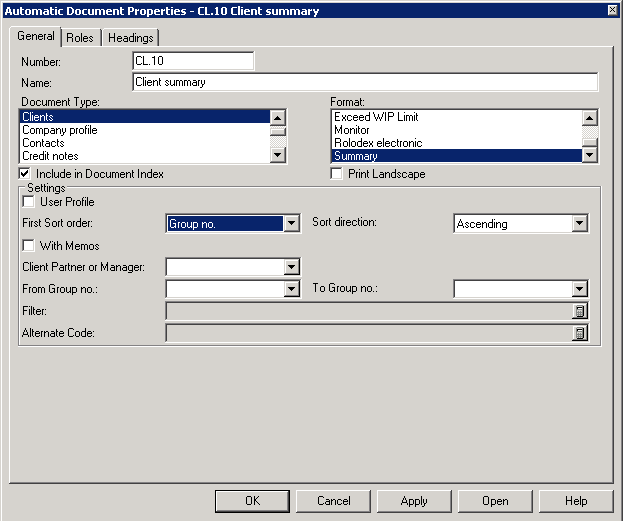
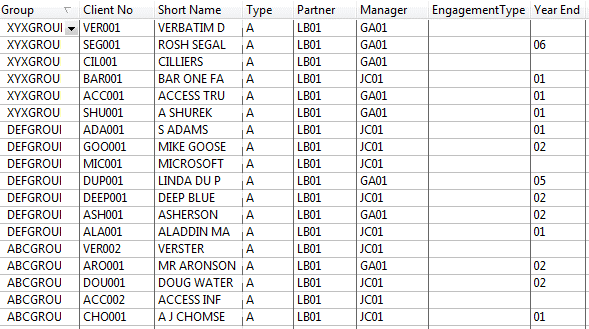
To obtain a list of your clients by group print a Client Summary by Group report. Right click on this report, select properties and set the document properties to:
- Document type - Clients.
- Format - Summary.
- Order - Group (filter by group if you want to print groups separately).
To change or reassign groups, select the Client Monitor Report. Right click on this report, select properties and set the document properties to:
- Document type - Clients.
- Format - Monitor.
- Order - Group.
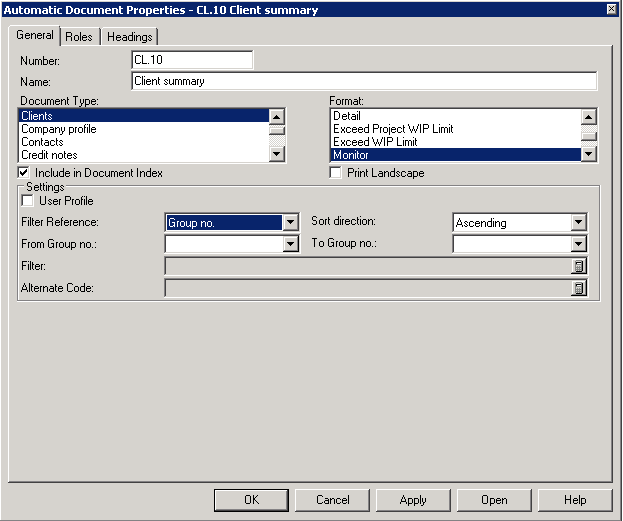
When the document is open, click in the group column and select the drop down list to alter the groups.
2.3. Revising clients’ Partner/Manager allocations in Caseware Time
To obtain a list of your clients by partner print a Client Summary by Partner report. Right click on this report, select properties and set the document properties to:
- Document type – Clients.
- Format - Summary.
- Order - Partner (filter by partner if you want to print partners separately).
Use the same report to check the manager allocations, selecting manager instead of partner.

To change or reassign partners or managers by using the Client Monitor Report, right click on this report, select properties and set the document properties to:
- Document type - Clients.
- Format -Monitor. Order - Number.
- Client Partner or Manager - Select the partner or manager you want to reassign

- When the document is open, click in the partner or manager column and select the drop down list to alter the partner or manager.

Step 3 Staff Maintenance
3.1. Inactive Staff in Caseware Time
To obtain a list of your active/inactive Caseware Time staff, print a Staff Monitor report. Right click on this report, select properties and set the document properties to:
- Document type – Staff.
- Format – Monitor.
To make staff inactive in Caseware Time staff, select Setup | Staff from the menu and select typeas "Inactive". Staff cannot be made inactive if:
- Staff member has time/expenses entered later than the inactive date.
- Staff is marked as Partner/Manager against a client/group. (Refer to 2.3. Revise Clients’ Partner/Manager allocations in Caseware Time)
- Staff is allocated against any projects as “In charge” or “Team leader”.
Note: Timekeepers will only be purge if all the WIP against them are billed with a final invoice. Refer to step 1.1.
3.2. Revise Projects “In Charge” or “Team Leader” allocations in Time
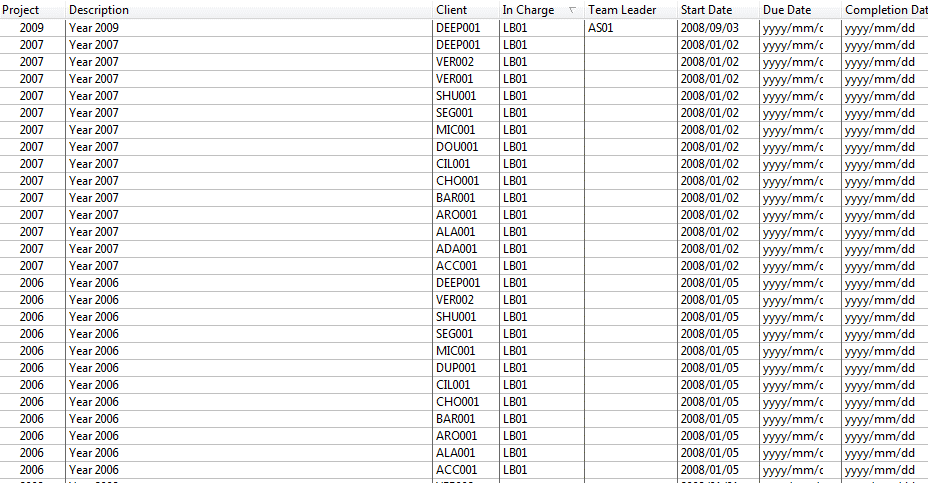
To change the project “In Charge” or “Team Leader” you can use the Project Monitor report
Right click on this report, select properties and set the document properties to:
- Document Type – Projects.
- Format - Monitor – Projects (run this report a second time using Monitor – Sub Projects).
When the document is open, click in the “In Charge” or “Team Leader” column and select the drop down list to alter the “In Charge” or “Team Leader”.
Step 4 Diagnostics & Reports
4.1. Diagnostics
By running diagnostics, you can check the file for errors or inconsistencies in the data.
From the menu, select Tools | Diagnostics and select run a diagnostic report for each of the
following areas:
- Company
- Profile
- Client
- Staff Receivables
- Work in Process
- Projects
When selecting each diagnostic, you only have to select “Show Me” Errors & Critical Errors.
Very important: Should you have any diagnostic errors, please contact the Support team before running your year-end close. Please do this as soon as possible to allow yourself and Caseware Africa enough time to resolve any potential issues.
Step 5 Backup
Making a backup of your data is a very important step in the year-end close process. This will ensure that your data is retained in the original format should you encounter any issues during the year-end close or other processes. Before making a backup, make sure the Caseware Time file is uncompressed.
Also ensure that all users are logged out of Caseware Time, TaxWare and SecWare. In Caseware Time this can be done by selecting "Staff Logged In" under the "File" menu. TaxWare and SecWare do not currently offer a "Staff Logged In" function - this has to be checked manually.
5.1. Backup SecWare
- Open your SecWare File on the server (this is very important).
- On the File menu, select Backup.
- Specify a file name (a *.bkz file will be created). Press “Save” to start the backup.
- Close your SecWare File.
5.2. Backup TaxWare
- Open the TaxWare file on the server (this is very important).
- Select “Backup” from the “File” menu.
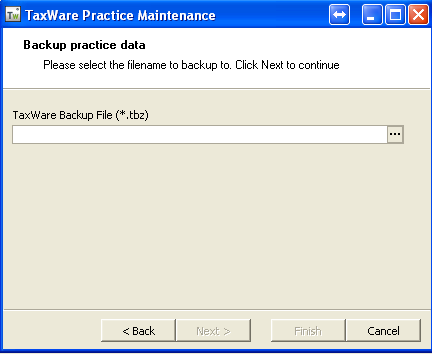
- Click on the Ellipses ‘…’ as shown above, in order to specify a path and filename in which to back up the data.
Note: It is good practice to use a naming convention when creating file names for these backups. For ease of use, we suggest that you begin the filename with the current date. For Example, 28022010.tbz will mean that the backup was made on the 28th of February 2010.
- Be sure to include the extension tbz after the filename.
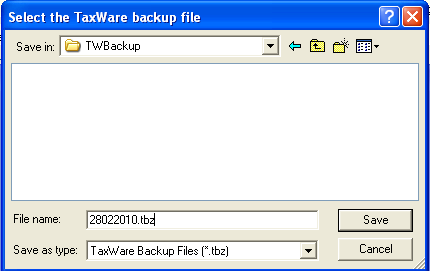
- Once you have specified a filename and path for the backup, click on the open button, this will bring you back to the practice maintenance screen.
- Confirm the backup selections by clicking on the ‘Next’ button; which will bring you to the Summary screen. Should there be any irregularities, then you can click on the ‘Back’ button in order to make the necessary changes.
- Complete the backup by clicking on the ‘Finish’ button. TaxWare 2009 will inform you of a successful backup on the Congratulations Screen.
5.3. Backup Caseware Time
- Caseware Time should always be backed up last, after SecWare and backed up.
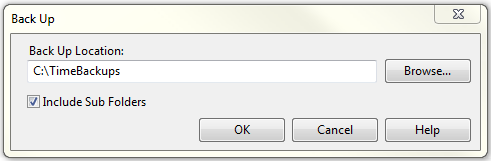
- Open your Caseware Time File on the server (this is very important). Select Tools |Maintenance | Backup/Restore File.

- Then click on the Browse button and locate your backup folder, thick the “Include Sub Folder” box and then select OK. This will process will create a backup in your backup folder.
Step 6 Perform the Year end Close
6.1. Year end close in Caseware Time
- Ensure that all users are logged out of SecWare/TaxWare/Caseware Time.
- If the data is located on a server, perform the backup from the server. From the menu, select File |Year End Close.
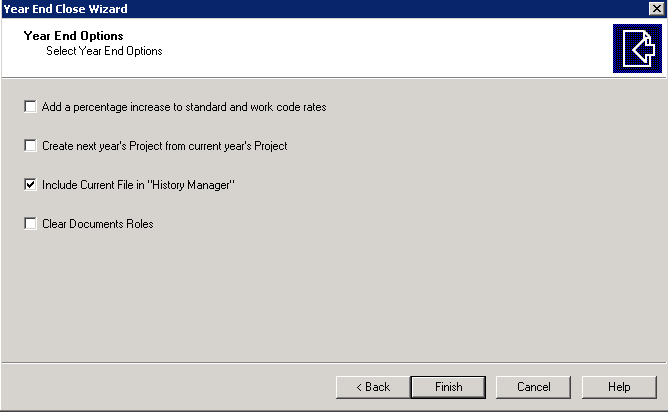
- The Year End Wizard will give you 2 options for Year End Close.
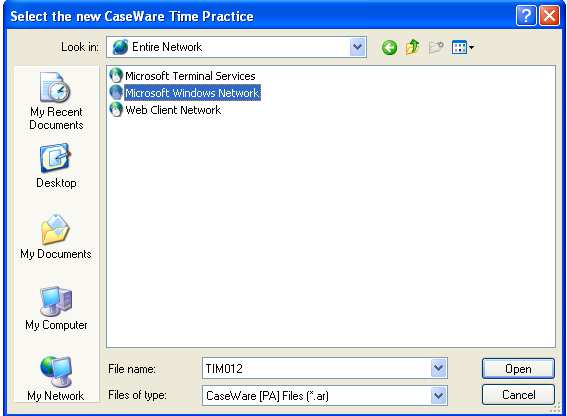
- “Create new file for New Year" is the only option to be selected

We recommend your filename is maximum 6 characters, only contains alphanumeric characters, no spaces and includes the new financial year (e.g. TIM012)
- Select next and select Include Current File in “History Manager” then click finish
Immediately proceed to complete the yearend on TaxWare and SecWare any processing is done in any of the systems.
6.2. Year end close in TaxWare
The year end close in TaxWare must always be done AFTER the year end has been done in Caseware Time.
TaxWares year end must always be done directly after Time’s year end was any processing is done on any of the systems.
Ensure that all users are logged out of SecWare/TaxWare/Caseware Time. If the data is located on a server, perform the backup from the server. Launch TaxWare - ensure you are in the correct file, logged in as supervisor. From the menu, select File | Caseware Year End Close.
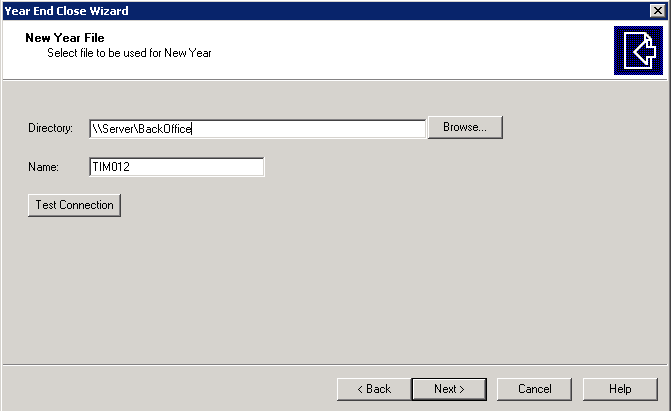
This action will ask you to point to the newly created Caseware Time file.

TIP: Always use absolute “UNC” paths to point to data (\\server\data) instead of mapped paths (g:\data).
6.3. Year-end close in SecWare
The year end close in SecWare must always be done AFTER the year end has been done on Caseware Time.
SecWare’s year-end must always be done directly after Caseware Time’s year end was done, before any processing is done on any of the systems.
Ensure that all users are logged out of SecWare/TaxWare/Caseware Time. If the data is located on a server, perform the backup from the server. Launch SecWare; ensure you are in the correct file, logged in as supervisor. From the menu, select File | Caseware Year End Close.
This action will ask you to point to the newly created Caseware Time file.
 TIP
TIP: Always use absolute paths to point to data (\\server\data) instead of mapped paths (g:\data).
After pointing to the new file all SecWare files will be copied to the new Caseware Time file location.
Step 7 Protect the prior year files
7.1. Setting up protection on the prior year Caseware Time file
To protect the prior year file against any unwanted processing, change all user rights in the prior year file to view only.
Launch Caseware Time; ensure you are in the prior year file, logged in as the supervisor.
- From the menu, select Tools | Protection | Protection Setup.
- Select each protection group individually, then click on the “Properties” button on the bottom right-hand side and remove all processing rights leaving only viewing rights.
This may be a good time to review security rights in the new file - follow the same procedure in the new file and assign the appropriate processing and viewing rights to all staff.
You have successfully performed the year end close on your Practice Management Suite of products. It is now required to ensure all workstations can access the new files.
It is very important to continue with the following steps.
Step 8 Create User access to new files
8.1. Preventing processing on old files
Ensure you have completed Step 6 to prevent processing on old files after year end.
8.2. Informing users of year-end close and file access changes
Send an email or note to all staff explaining the following:
A year end was performed on the software file paths and access have changed. Security rights have been reviewed.
Ensure someone technical is available to assist staff running into problems logging into the new files.
Include in the note to staff the following information:
Caseware Time
-
File for last year was called (include path and file name) and is now only available for viewing (processing is not allowed)
-
File for the new year is called (include path and file name) and access rights have been reviewed.
SecWare
-
File for last year was called (include path and file name) and is now only available for viewing (processing is not allowed).
-
File for the new year is called (include path and file name) and access rights have been reviewed.
-
SecWare users should be aware that SecWare has an option to automatically open the last used file, so after getting this note, users need to select, from the menu, File/Open and go to the file as specified. On their next open, it will then open the new file automatically.
TaxWare
Step 9 Diagnostics & Reports after the Year-end close
9.1. Diagnostics
See Step 4 for instructions on running diagnostics. Should you have any diagnostics errors, please contact the Support team.
9.2. Reports
See Step 1 for running WIP and Debtors reports. Compare the opening balances of the reports in the new file with previously printed reports before year-end. Should you have any anomalies, please contact the Support team.
Step 10 Backup after year-end
See Step 5 for instructions on making backups.
Step 11 Ongoing maintenance
11.1 Daily Backups
We recommend daily backups as best practice.
See Step 5 for instructions on making backups.
11.2 Weekly diagnostics
We recommend weekly diagnostic as best practice.
See Step 4 for instructions on running diagnostics.
11.3 Month End Procedure
We recommend you perform a complete month end procedure every month as best practice.
Consult with Caseware Africa if you not sure what the correct month end procedures are.
Instructions:
Introduction
This document covers the full spectrum of the year-end close procedures in the Practice Management Suite of
Products, covering mostly Caseware Time procedures including:
- Staff and Client Maintenance
- Other year-end procedures, including the Year End close procedures to be performed in
- SecWare and TaxWare for integrated practices.
Objectives:
- Assist Caseware Time users (integrated or non-integrated with TaxWare and SecWare) to perform a successful year end on their Caseware Africa product files. This includes:
- Writing off unwanted WIP in Caseware Time Performing client and staff maintenance Running diagnostics and reports
- Performing the actual year end close
- User access to prior year and new files
Please Note: If you are going to perform a Year End Close after the Year End Close date or on future periods you should not apply future cash receipts and credit notes to previous year invoices.
If you have, you will need to un-apply these cash receipts or credit notes before completing the Year End Close.
Rate this article:
|vote=None|
Processing...
(Popularity = 7/100, Rating = 0.0/5)
Related Articles
Getting Started | Year end close
How to perform a multiple year end close
How to perform a Year-End Close
Practice Management Suite | How do I resolve a Year End Close (YEC) or rollover error in TaxWare and SecWare?
view all...